This recipe for Docs was written by Gary Dawson of Gary Dawson Designs.
Gary is a master jeweler, caster and CAD teacher.
Description:
Doc’s Casting Plaster was specially formulated by Marc Robinson some time ago as a vast improvement to existing methods for casting platinum in the small shop. It is a modified high-speed dental investment that is phosphate based. It is different from standard jewelry-industry, gypsum-based investments and less forgiving. Attention to detail is required when investing…please see factory instructions included in the box with Doc’s as a great introduction.
Advantages:
- For casting with photopolymer resins, this product seems to eliminate the overall surface distortion problems that seem to occur when casting these materials with Gypsum-based investments.
- Using the process outlined below, investment to casting time can be as little as 2.5 hours!
- This investment can be cast using centrifugal or vacuum casting methods.
Possible Disadvantages:
- The material is very hard and can be difficult to break out using a steel flask. (See next section for breakout help)
- This investment can crack and produce minor flashing on cast models.
- This represents a small problem compared to the overall surface deformations that can occur with Gypsum investments as flashing is typically minimal and tends to occur on outside edges where it can be easily removed. Attending to precise measurements and following the burnout below will reduce or eliminate the possibility of flashing with flaskless casting. Also, the use of stainless steel hose clamps directly on the investment during burnout and casting can reduce the possibility of flashing and can be removed prior to breakout. I use 2 clamps and try to cover the area of the model. This seems to virtually eliminate flashing in my experience.
My process with Doc’s varies somewhat from the factory-included instructions, you may want to try both the factory method and the one that follows to see what works best for you!
Figure 1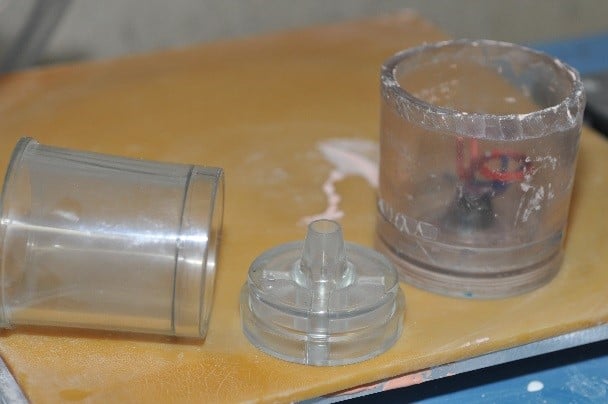 |
Flask or Flask-less: (Note: the dental industry calls a flask a “ring” and since some of the items described in the following instructions currently seem to be available only from dental supply sources, I’ll call them rings.) (See Figure 1)
Casting with Doc’s can be done either using a standard steel flask or can be done flask or ring-less. If casting with a steel we recommend using a non-asbestos flask liner material to facilitate easier removal of the hardened investment from the flask/ring after casting. The material sets up very hard.
I prefer to use Doc’s ring-less, which requires the use of a special urethane ring and base (flask and sprue-base in jewelry terminology) available here… http://www.pearsondental.com/catalog/product.asp?catid=464&majcatid=27&subcatid=3649
(I hope to find a less expensive source for these and may manufacture them myself in the near future.)
This involves spruing normally on a urethane sprue base, using the urethane ring and then when the material hardens sufficiently during the curing process, slipping the hardened investment out of the ring.
Powder to Binder Ratio:
For each 2.5” x 2.5” ring I use 360 grams of investment powder and 92-93 Ml of binder at room temperature. This is slight variation on the recommended 25/100 ratio suggested in documentation supplied with the investment.
Figure 2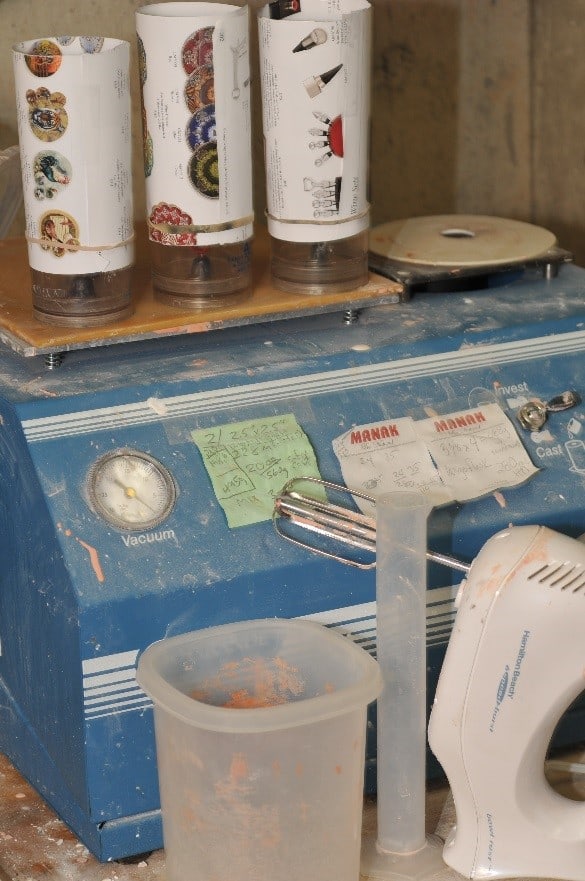 |
Mixing:
What you will need: (Please see Figure 2)
- Tall plastic container (Do not use rubber mixing container)
- Milliliter gauge
- Hand Mixer
- Flasks (Called “rings” in the dental industry)
- Expansion Rings
Working time is short, have all stages of the process ready, and ring(s) prepared with tall expansion rings. For the expansion ring I use about 2/3rds of the width of a slick catalog page, applied to the top of the urethane ring with a rubber band and secured together with scotch tape to prevent leakage as the investment expands. Plan for a 4 min. working time from beginning to end. Start by manually mixing powder and binder using the blade of an inexpensive hand-mixer. After about 10-15 seconds of manual mixing turn on the hand mixer to a fast speed and mix until material is thoroughly blended, about 1 minute total. This material expands a great deal during vacuuming and you should mix and vacuum in a tall container.
I use a typical two-stage vacuum process, vacuuming until the “fall” in the mixing container and then vacuuming again in the ring. Doing this within the working time of the investment requires a good vacuum system with no leaks. Let set after release of final vacuum until the material begins to heat up with a chemical reaction, about 3-4 min. At that point it will be fairly hard. Then peel the base off and slip the investment out of the urethane ring.
Burnout:
I place the just hardened and heating (through chemical reaction) investment, now free from the urethane ring into a cold kiln, button-side down and ramp as fast as possible to 1350°F, hold there for ½ hour and then ramp down to 1000°F or your desired casting temperature for casting. The entire process from investing to casting is only about 2.5-3 hours.
Breakout:
After resting the casting until all color is out of the button in a dark room the best way to begin breakout is to simply whack the investment with a hammer until your object is released. There will still be substantial investment clinging to your cast object, much of which can be pried/broken away with an old knife or similar object. For final de-vesting I use a “Fabric Spot-Cleaner” available from Otto Frei here…
http://www.ottofrei.com/Micro-Pressure-Washer.html
I just use water with this tool, no special sauce.
Figure 3 |
Casting results in Platinum, 14K yellow gold, 14K white gold, left to right…
(See Figure 3)